Step 3: Callout Template Request Body (Form-Encoded Format) (Old Interface)
Request Body Page (Form Encoded Body Builder)
If you selected “Form Encoded” in the first step of the wizard for “Request Body Format”, the 3rd step will let you build the form encoded POST string.
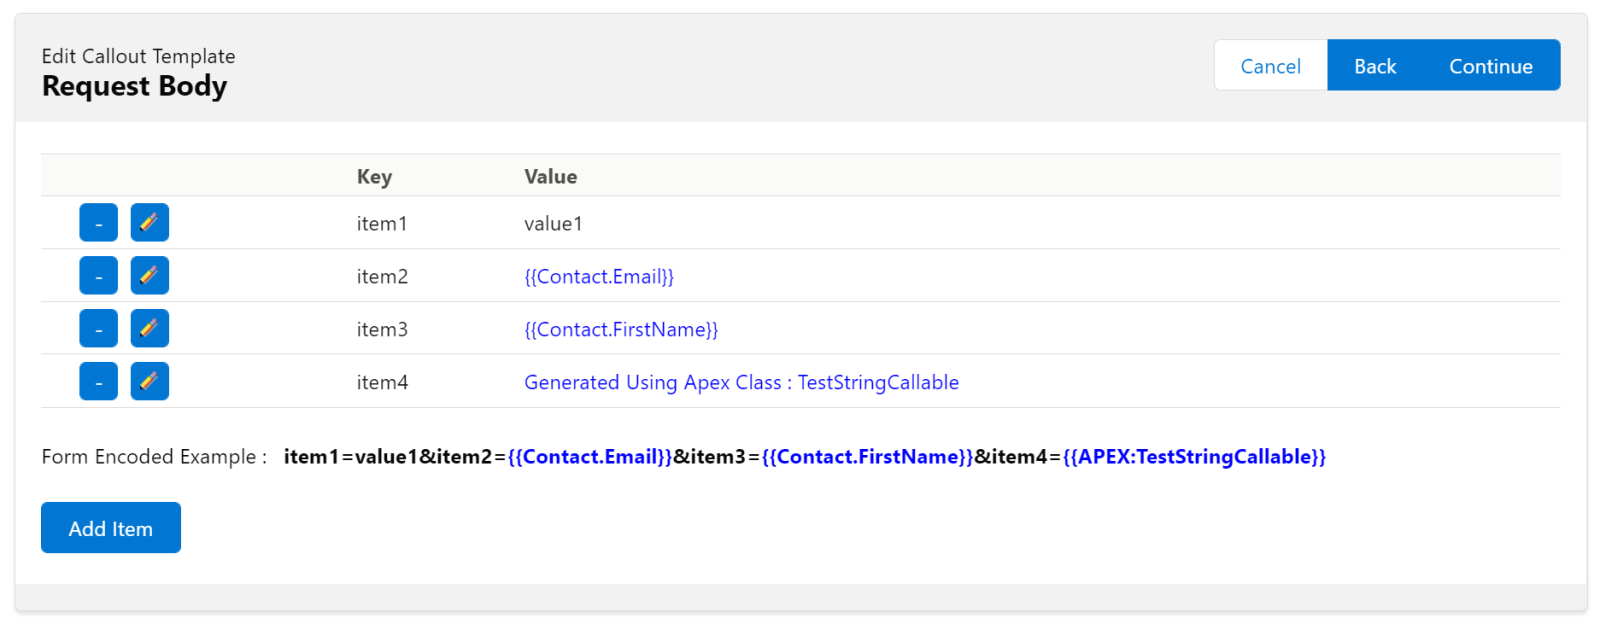
The Form-Encoded body is composed of name-value pairs in the format name1=value1&name2=value2…
In order to define new body elements, click on the ‘Add Item’ button. A new popup will be displayed, where you can add the details of the form element:
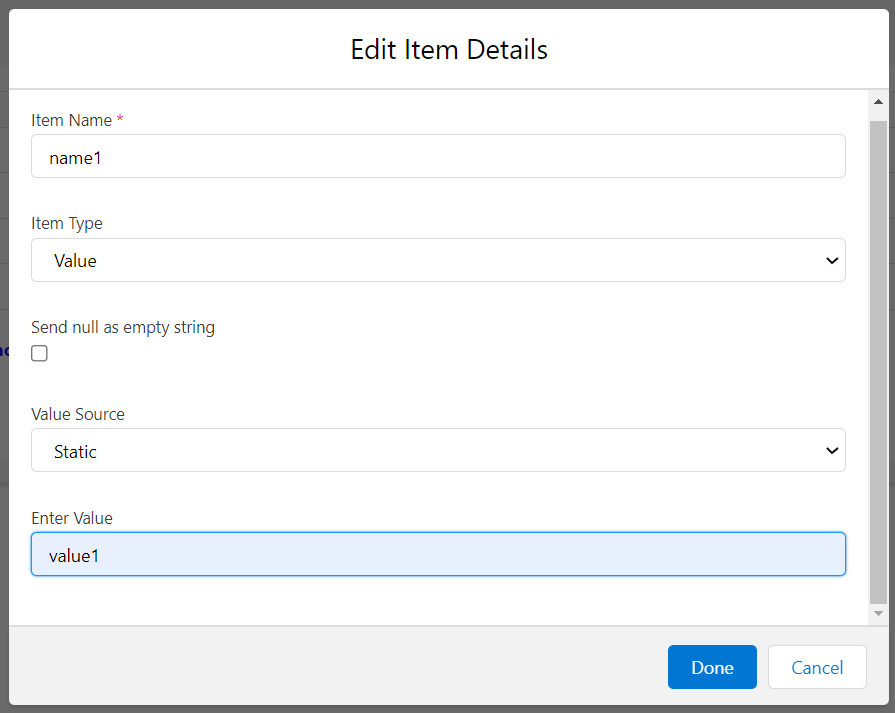
If you select the Item Type as “Value“, you can specify what value to use:
- Static value: You can set a static value to be sent to the server for the selected name. Simply select “Static” for Value Source, then add your static value below.
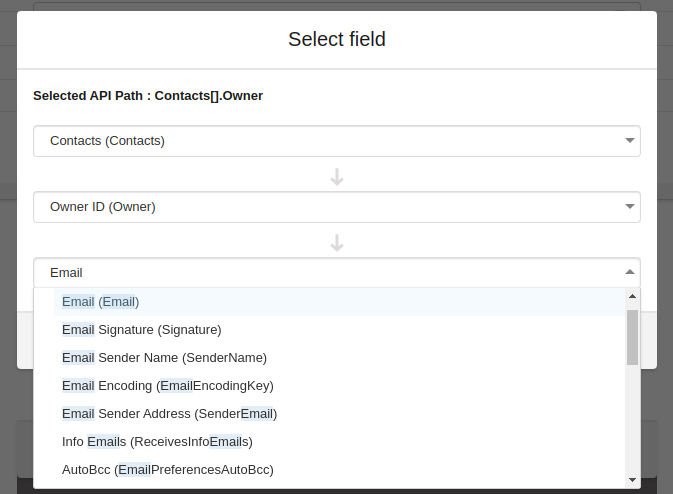
- Field mapping: This option allows you to map a field from the selected main object or any related record. Select “Field” for Value Source. The Field Selector allows you to select fields from the Main Object, any related object (up to 5 levels deep) and any related list (one level). For example, if the Main Object is Account, the selection below allows you to select the Email of the Owner of each related Contact.
- If the selected field is a Blob field (for example Attachment -> Body or ContentVersion -> VersionData), then you will also be asked to provide the encoding to be used: Base64, Hex or Raw (which only works for UTF-8 content)
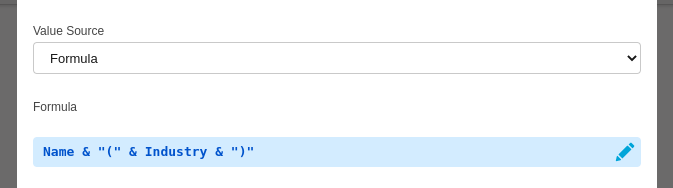
- Formula: This option allows you to build a formula using the current object’s fields that will be used to generate the node. See more details in the “Using Formulas” section of this user guide.
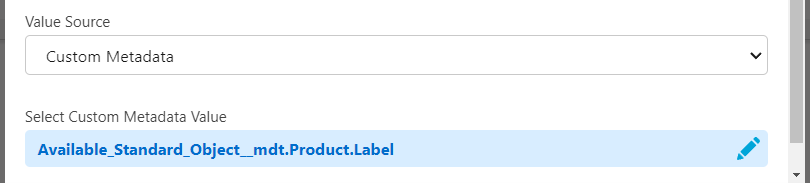
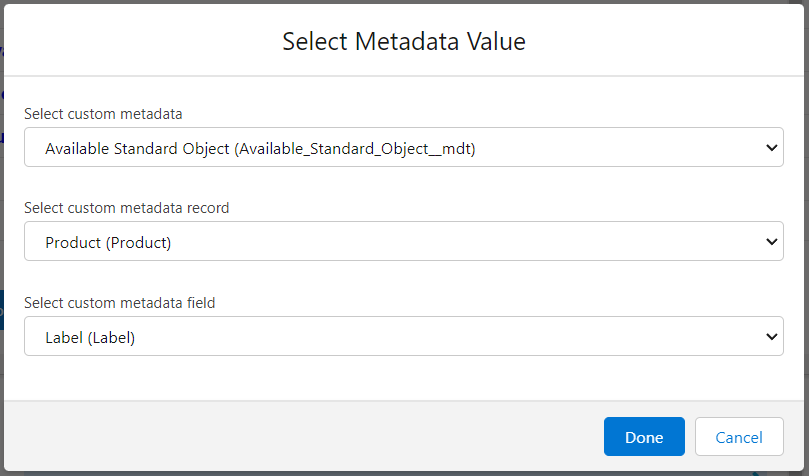
- Custom Metadata: This allows you to map a field from a Custom Metadata Type record.
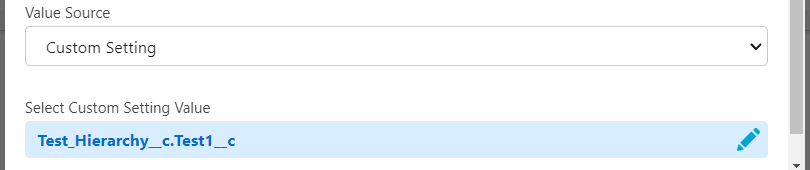
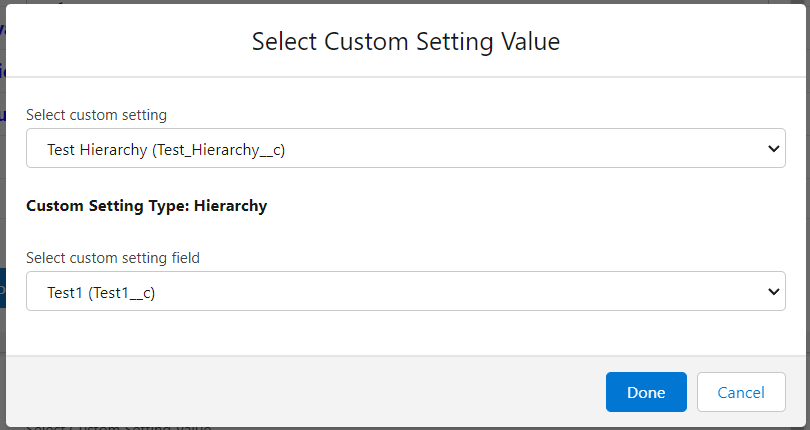
- Custom Setting: This allows you to map a field from a Hierarchy or List Custom Setting record
If you select the Item Type as “Apex“, you can generate the value of the node using an Apex class. You can now mention the class name to use.
The selected class needs to be global and extend the d_wh.GenerateStringCallable abstract class.Below is an example class that can be used to generate the header value:
global class TestCallable extends d_wh.GenerateStringCallable {

    global override String Generate(List<Id> mainRecordIds) {

        // Add code to generate the string to be used as the value of the item

        // return mainRecordIds[0];

    }

}
The mainRecordIds parameter contains the list of ids of the main record(s). If the callout is a “One Record” type, the list will contain one Id. If no Main Object is selected, the list will be empty.The response should be a string and is going to be used as the item value when the callout is made.
