Step 2: Callout Sequence Items
Define Callout Sequence Steps
This page is where you can define all the callouts this sequence will make.
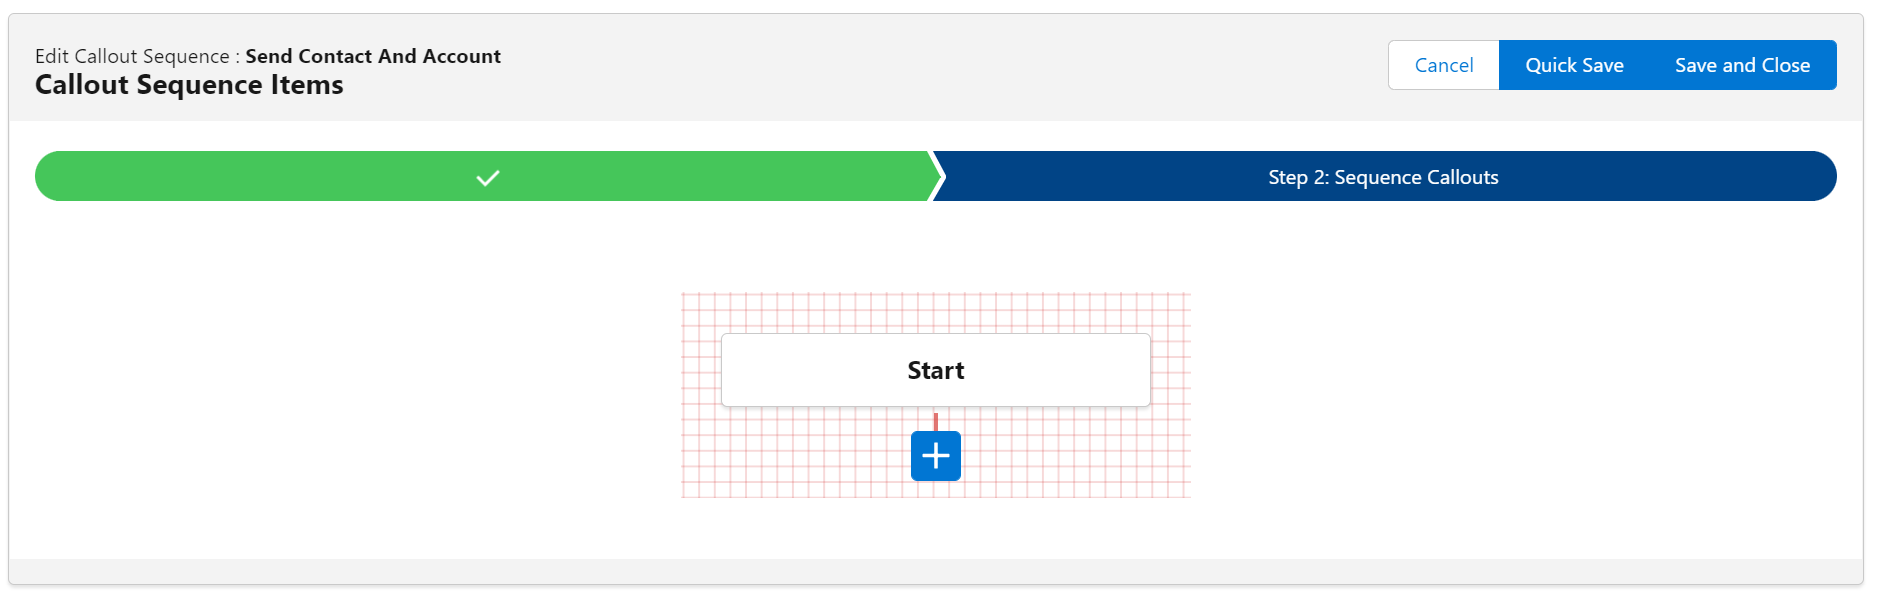
In order to add the first step, click on the “+” icon. It will open a popup form where you can edit the call.
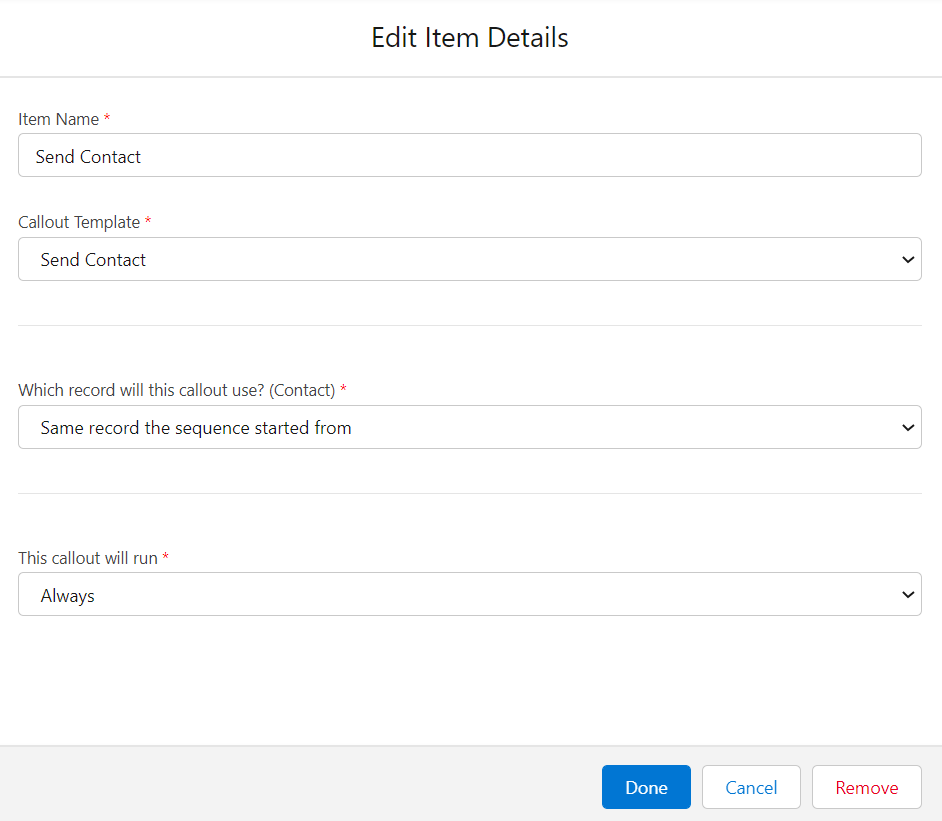
Item Name
This is the step name. Make sure to name each step in such way so you can easily recognize what the step does.
Callout Template
This is where you select the Callout Template you want to use to make the call for this step. The template you select will influence the fields you see below it.
NOTE: The Callout Templates need to be created before the Callout Sequence.
Which record will this callout use?
If you selected a template with a Main Object in the input above, you are asked which record to use. You have a few options:
- Same record the sequence started from – If you started the sequence with a Contact record, the same record will be used to make this call. This option is available only if the selected Callout Template has the same Main Object as the Callout Sequence.
- A record the sequence main record is related to – This option lets you select a lookup or master-detail field from the Callout Sequence’s main object. You are only able to select relation fields that are the same type as the selected Callout Template main object. If the main object of the sequence is Contact and you selected a Callout Template with Account as the main object, you should be able to select the AccountId field.
- Same record as the previous callout – This option will run the current callout with the same record as the previous callout. This is available only if it’s not the first step in the sequence AND the selected Callout Template main object in the previous step is the same as the current step Callout Template main object.
- A record created/upserted by the previous callout’s actions – This option is available if the previous callout has “Create Record” or “Upsert Single Record” actions and the records created / upserted are the same type as the currently selected Callout Template main object.
- Use the field selector to choose – If none of the options above makes sense, you can use the field selector to select a field from the sequence main object. The field selector will allow you to select lookup fields from the main record, related lists, related objects, etc.
This callout will run
This section is where you can define the criteria to use to decide if this step will run. You have a few options:
- Always – This will ensure this callout will always run when its turn comes, even if the previous call failed.
- If previous call was successful – This option is available if the step is not the first step in the sequence. If the previous call failed, this option will make the current step not run. It will either stop the sequence (if there is no other branch step) or test the next branch step (see more in the Branching section below)
- Based on a custom condition – This option lets you build a custom condition that can be based on the Callout Sequence Main Object fields, previous callout response status or a JSON node from the previous call response.

After you complete all the details, click “Done” to close the popup form. To edit a step, you can click on it and the popup with the details will open again.
NOTE: The steps are not yet saved. To save them, you can either click “Quick Save” to save and stay in the wizard or “Save and Close” to save and close the wizard.
After you finish defining all the sequence steps, click “Save and Close”.
Branching
The Callout Sequence items can branch in different directions based on criteria you select for each step.
Click on the “+” button that is under a step will add another step as a branch, next to the child step. It will NOT add a step between 2 steps.

This allows you to call different templates based on the criteria logic. In the case above, the sequence will decide which step to take based on each step condition. The first one that matches will be the branch the sequence will use. If no step will match the condition, then the sequence will stop.
Looking at the image above, when the sequence will start running, it first evaluates the Send Account step criteria and, if it matches, it will go down that branch. If it doesn’t, it evaluates the Send Only Contact step criteria. If none of them passes, the sequence will stop.
Example
In the image above, we can define the left side criteria as “If the related account does not have an external id”, and the right side criteria as “if the related account has an external id”. That way, if the contact we start the sequence with has its account in the external system already, we don’t need to send it again.
