Initiate a Sequence Using a Screen Flow
Include a Callout Sequence in a Screen Flow
To initiate a Callout Sequence in a visual Flow, you will start by going into Set Up and selecting Flows under Process Automation (be sure to check out Salesforce documentation on Flows as well!). Most processes will have this screenflow component as part of a Flow. Here we will review adding this component to a new or existing flow.
Complete the following steps:
- Select New Flow button
- Select Screenflow option then ‘Next’
- Choose the Auto Layout option
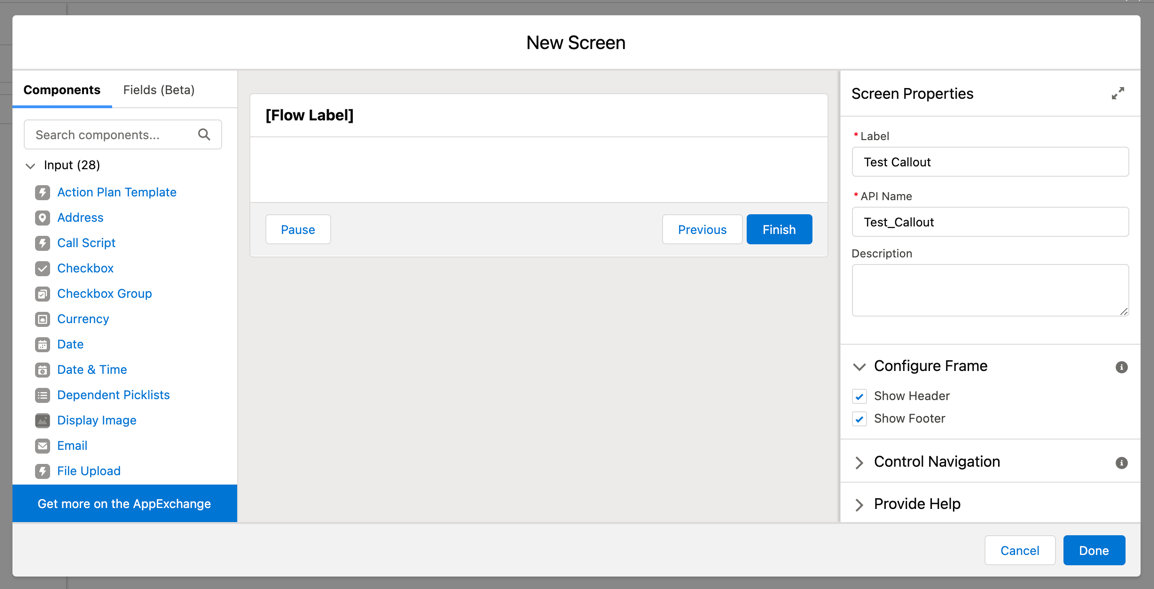
In Flow Builder, select ‘Add Screen.’

In the Flow Label you will need to give it a Name of your choosing.
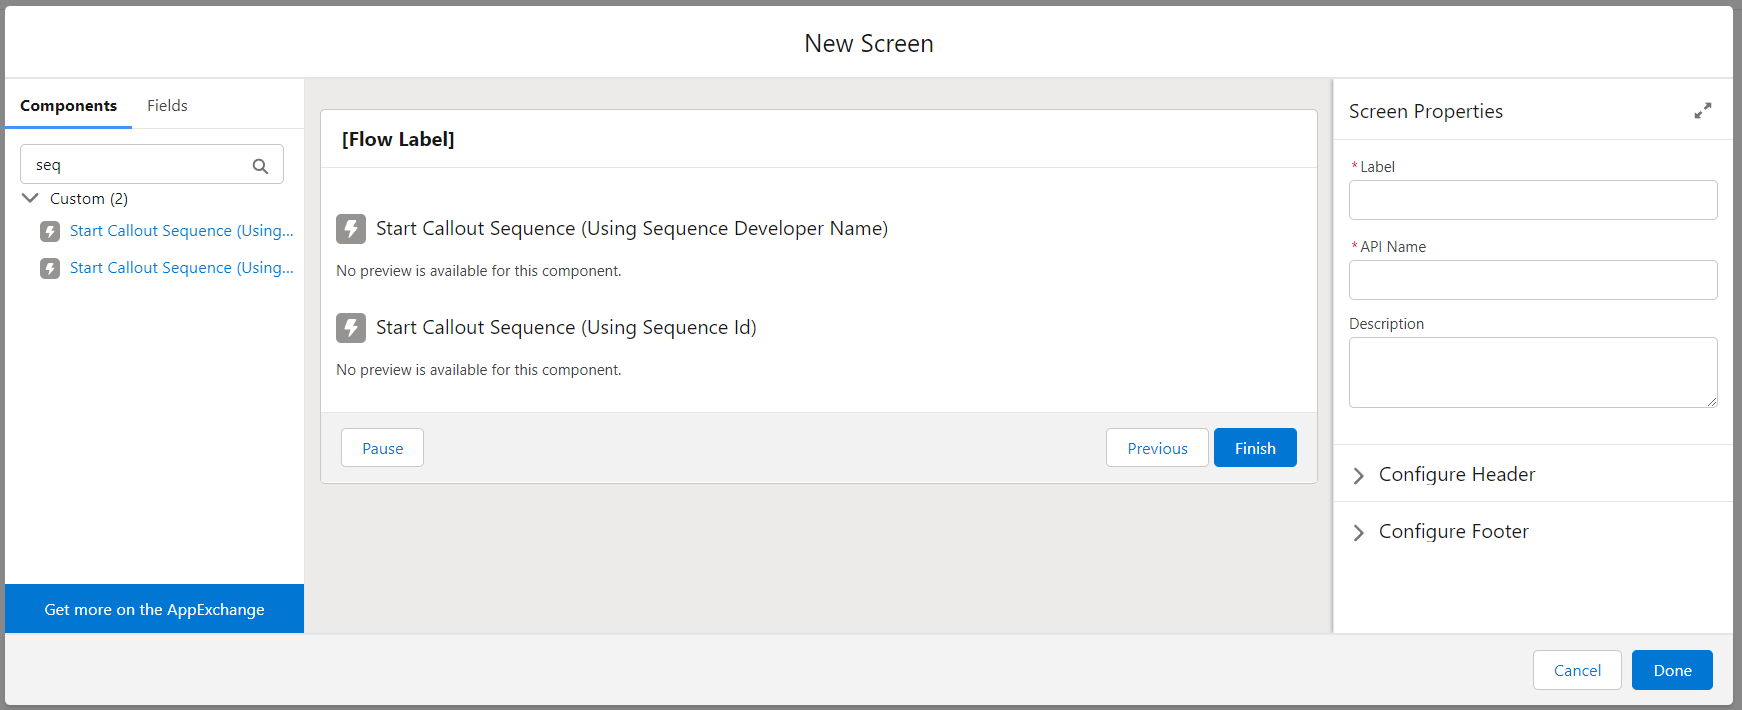
There are 2 screen components you can use to initiate a callout sequence: Start Callout Sequence (Using Sequence Developer Name) and Start Callout Sequence (Using Sequence Id). We recommend using the developer name version, which makes it easier to deploy between orgs and doesn’t hardcode record ids in your Salesforce setup.
In the Custom Components left sidebar, scroll to Custom. Find the desired ‘Start Callout Sequence’ component and drag it into the screen:
On the right sidebar, give the custom component a Name. Then in Callout Sequence Id or Callout Sequence Developer Name, enter the developer name or id of the sequence. You can identify your Callout Sequence ID or Callout Sequence Developer Name under the Administration tab – Callout Sequences subtab in the Declarative Webhooks app.

You will need to set the Main Record Id. Most Flows already have variables but if you need to set it here, do the following:
- Add new resource
- Resource Type = Variable
- API Name = recordID
- Data Type = Text

You have the option to set a default value in this screen. The recordID can be hardcoded but it is not recommended.
On the right sidebar, View Results will default to false:
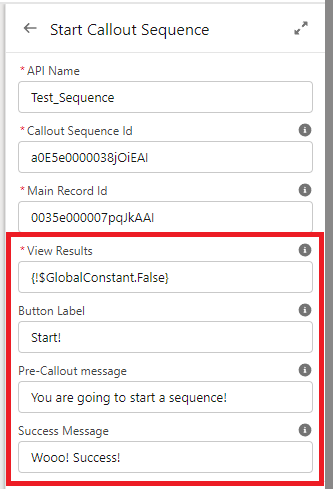
View Results allows the end user to view the result of the sequence initiation. If you want to enable this option change the value to {!$GlobalConstant.True}.
Button Label allows you to change the label of the “Initiate Callout Sequence” button.
Pre-Callout Message allows you to display a message to the user before initiating the sequence.
Success Message allows you to display a message to the user after the sequence is initiated.
It is recommended that you hide the footer of the screen where you add the Make Callout With Template element, as the element has navigation buttons and the footer might confuse the end user.
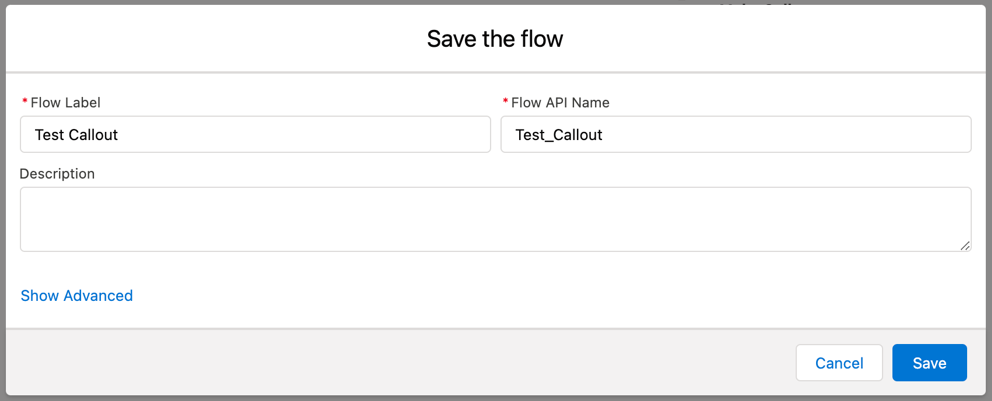
Save your screen and be sure to name your Flow.
NOTE: To Run your screenflow to test, you will need to have View Results as {!$GlobalConstant.True}.
We recommend testing this in your Sandbox before Production.
