Step 1: Inbound Template Details (Old Interface)
Details of the Inbound Call Template
In the app, select ‘Inbound Call Templates’ in the navigation bar. Then select ‘New:’

In the template details you will need to populate various fields as defined below.
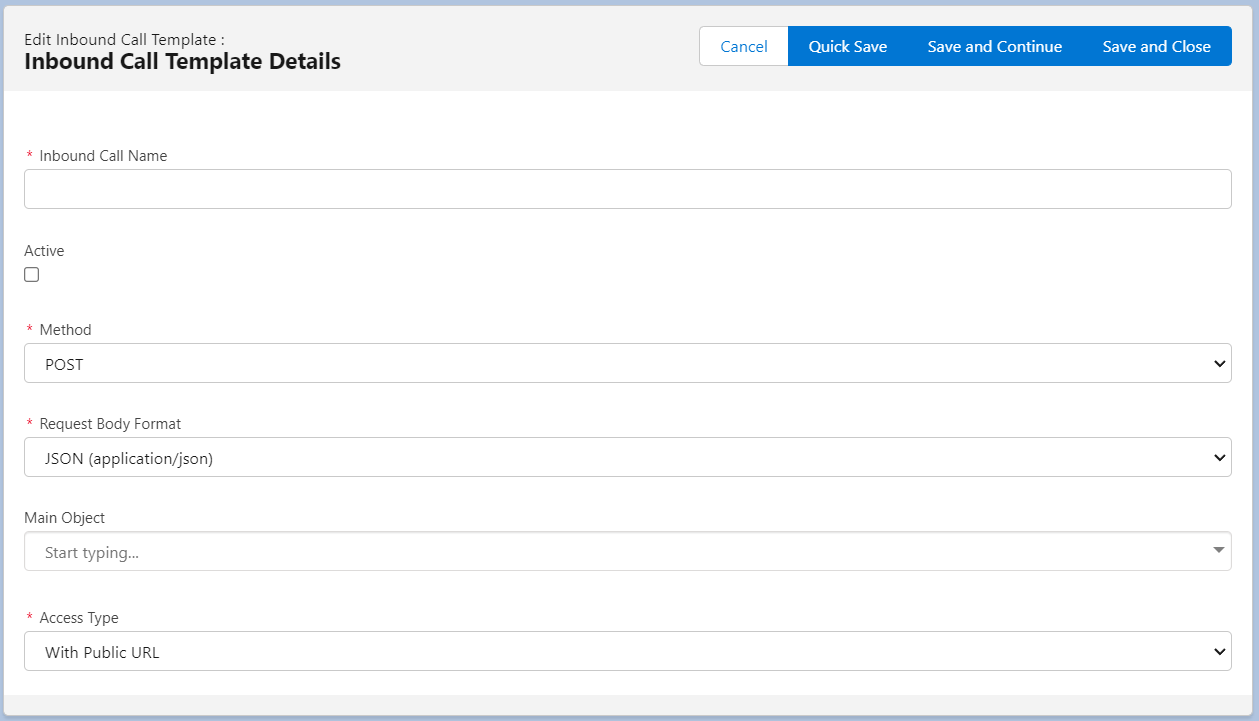
Inbound Call Name (Required)
This is the title of your template. You should name this something that you will be able to identify easily that is based on what the inbound call will do.
Active (Optional)
Mark this checkbox if the template should be live and accepting inbound calls. When you mark an inbound call template as Active, you are using one of your template counts as described in your Declarative Webhook subscription.
NOTE: You don’t need to have your template Active to test it. You can test any inbound call template via the “Test Inbound Call Template” button. We will review this in a later step.
Method
Select the HTTP Method that this inbound call template can accept. You can choose any of the standard methods: GET, PUT, PATCH, POST and DELETE
Request Body Format
Declarative Webhooks can accept 2 request body types: JSON (application/json) and Form-Encoded (application/x-www-form-urlencoded). You can select which one this template accepts.
Main Object (Optional)
A list of your SFDC standard and custom objects will appear in this dropdown menu. The “Main Object” is the object the inbound call will consider as the main record.
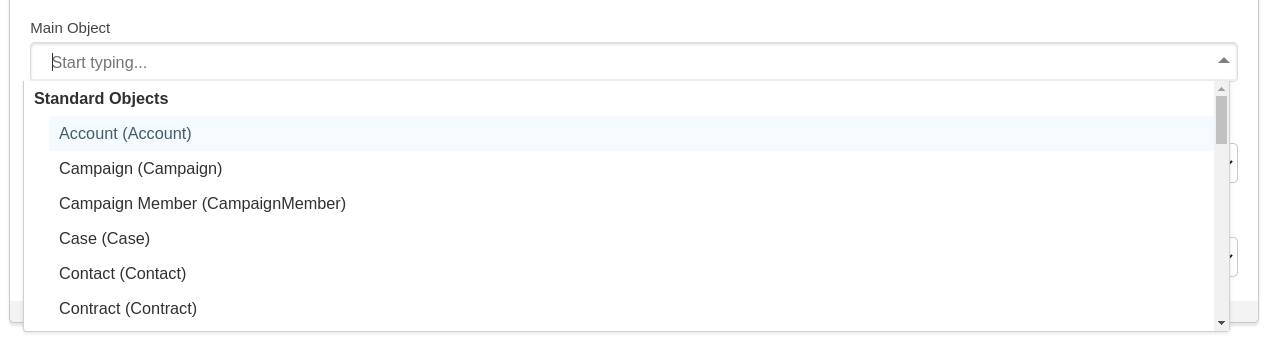
NOTE: Not all standard salesforce objects will appear here. If there is an object that is unavailable, please reach out to the Declarative Webhooks support team to make additional objects available.
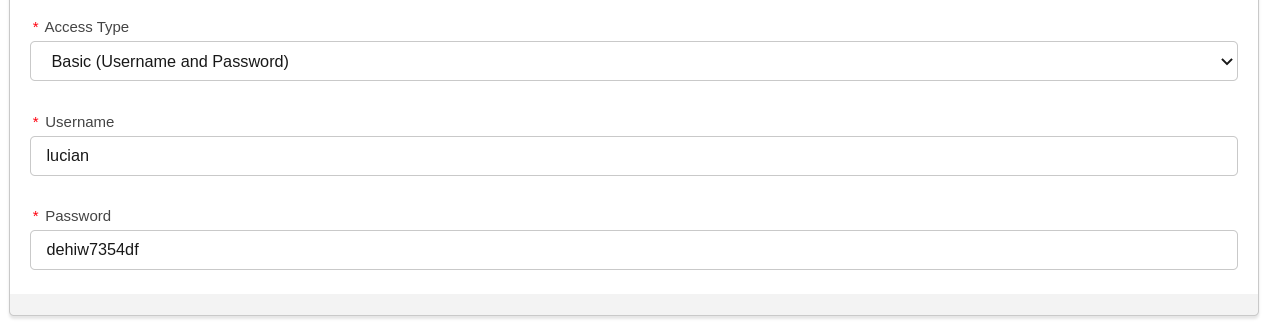
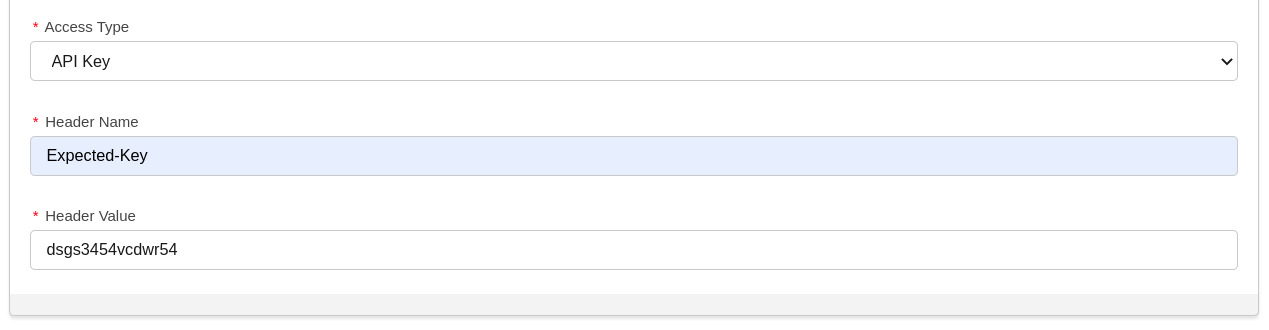
Access Type
This sets how this inbound call template can be accessed by the external system:
- With Public URL: If this option is selected, the template will have a public URL where any system can send calls without authenticating. This can be used for accepting webhooks from other systems.
- Authenticated with REST API: This will generate a private URL that cannot be accessed unless the system is authenticated into Salesforce’s API. The external system needs to be capable of authenticating into Salesforce using the API. See details about Salesforce REST API Authentication.
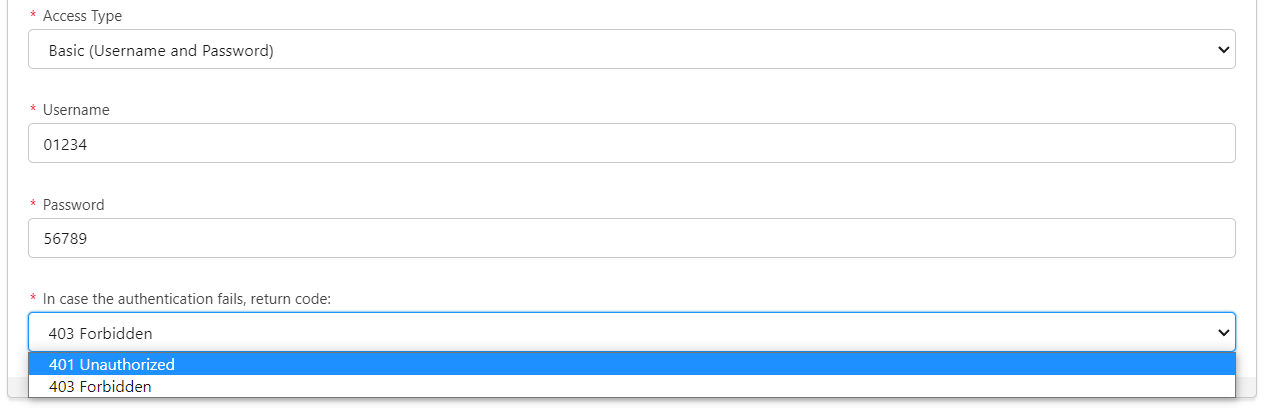
- Basic (Username and Password): If this option is selected, the user is prompted to provide the expected Username and Password. If an external system makes a call to this template and the Authorization header does not contain the Basic authentication format with the expected username and password, the response is automatically set to 401 (Unauthorized) or 403 (Forbidden), based on user’s selection.
- Bearer Token: If this option is selected, the user is prompted to provide the expected Bearer Token. If an external system makes a call to this template and the Authorization header does not contain the expected Bearer token value, the response is automatically set to 401 (Unauthorized) or 403 (Forbidden), based on user’s selection.
- API Key: If this option is selected, the user is prompted to provide the expected header name as well as the expected API Key value in the specified header. If an external system makes a call to this template without the correct header and value, the response is automatically set to 401 (Unauthorized) or 403 (Forbidden), based on user’s selection.
- SHA-256 Signed Body: If this option is selected, the user is prompted to provide the expected header name where the signature is expected to arrive, as well as a private key to verify the signature. If an external system makes a call to this template, the request body needs to be signed using the SHA-256 algorithm and the private key and sent into the expected header. The signature is accepted as base64 or hex. If the signature does not match, 401 (Unauthorized) or 403 (Forbidden) is returned (based on user’s selection).
- Use Apex Class To Verify Authentication: If the authentication verification is too complex, you have the option to provide an apex class that can verify the authentication based on headers and request body.

- The class used needs to be global and extend the d_wh.InboundAuthenticationCallable2 abstract class. Below is an example class that can be used to verify the authentication.
global class TestCallable extends d_wh.InboundAuthenticationCallable2 {

    global override Boolean Verify(Map<String, String> parameters, Map<String, String> headers, String body) {

        // Add code to verify authentication based on headers and body
        // return headers.get('custom-auth-header') == '346tecerw34cew';
    }
}
The parameters parameter contains a map of all URL parameters.
The headers parameter contains a map of all headers.
The body parameter contains the received request body as string. If the request body is binary and cannot be converted to UTF-8 string, it will be base64 encoded and the body parameter will contain the base64 encoded request body.
The response should be a boolean. True means the authentication was successful, false means it could not be verified successfully.

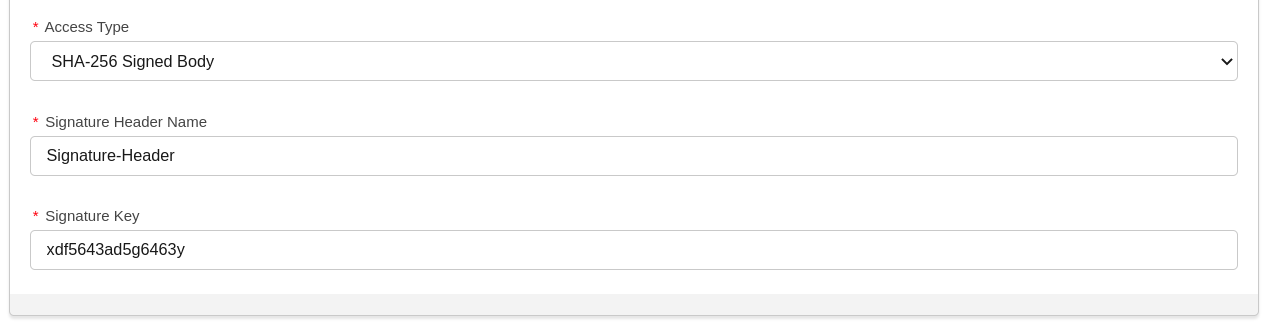
In case the authentication fails, return code:
If you select one of the custom authentication methods in the “Access Type” field above, you can select what HTTP code to respond with in case of authentication failure. You have a choice between “401 Unauthorized” and “403 Forbidden“. If you are not sure which one to use, 401 is the safer choice, used by most applications.
Once you have the details for your Inbound Template, select Continue.
