Step 1 : Callout Template Details
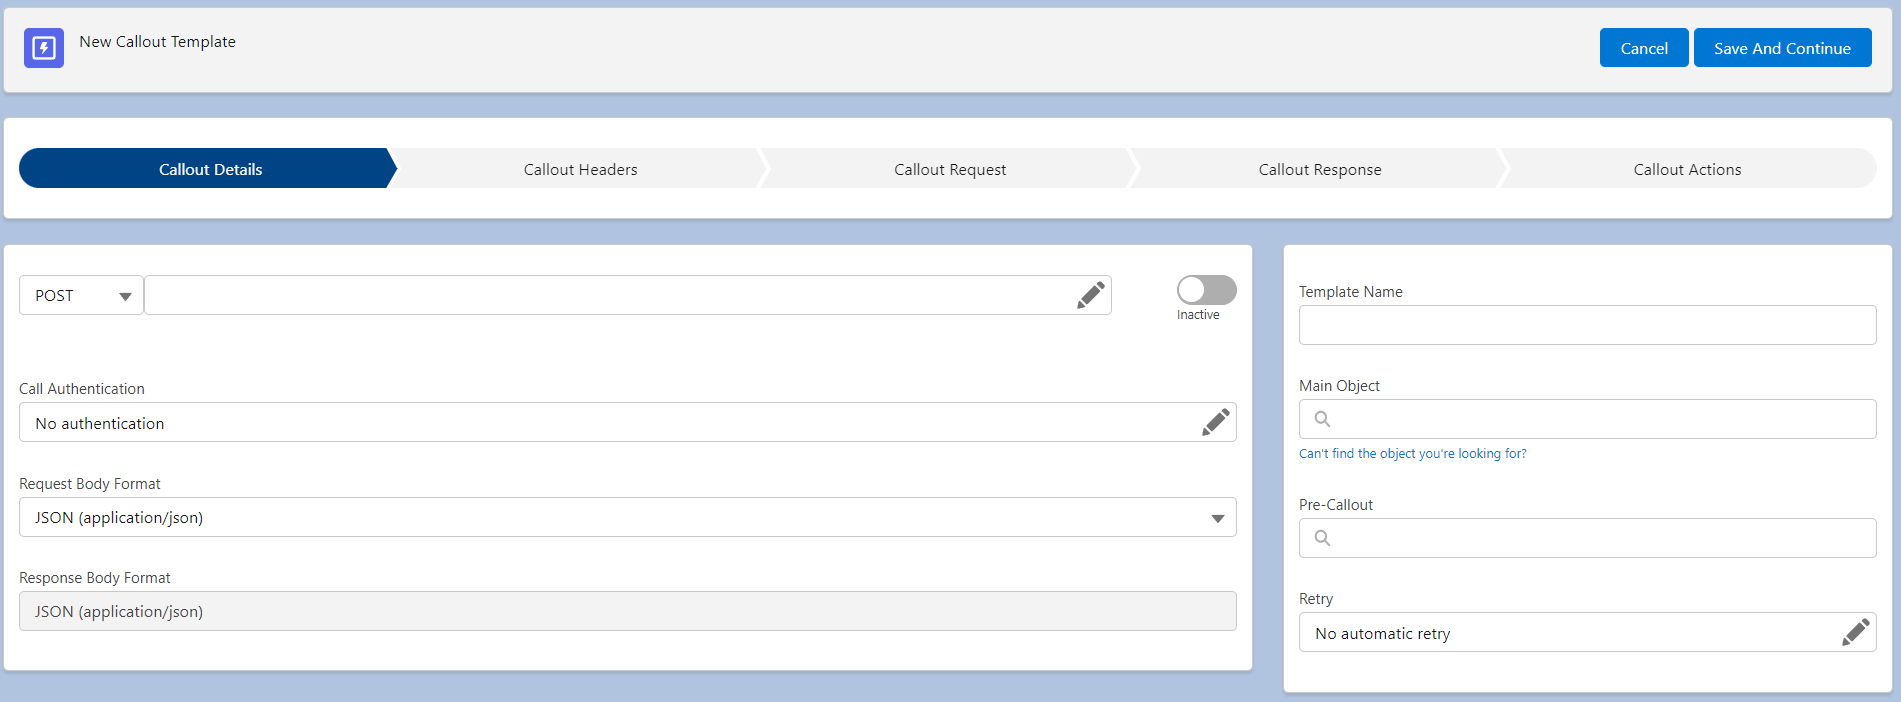
Callout Template Details Page
In the Declarative Webhooks app, select ‘Callout Templates’ in the navigation bar. Then select ‘New:’

This will start the Callout Template Wizard, which allows you to set the details of your callout.
Callout Method (Required)
Choose the appropriate Callout Method. API documentation from the app or platform being implemented can direct you to which option to choose:
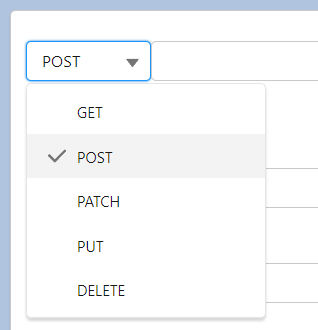
We have provided some quick definitions to get you started:
- GET: To get information from an external platform
- POST: To send information to an external platform
- PUT: To update information on an external platform
- PATCH: To apply partial updates to a resource on an external system
- DELETE: To delete something on an external platform
Callout URL (Required)
Here you will define the URL, or external system, you want to connect to. The URL can be found in the API documentation from the app or platform you are looking to implement.
You can include merge fields from your Salesforce Main Object (selected in the right side panel) in your Callout URL. In the example below, we have added a Callout URL to Google Maps and added street, city, state and zip code fields from the Account Salesforce Object. Field names must be entered as the API field name (not Label) for example: {!APIFIELD}). 
If the URL needs a more complex options, there are more advanced options to build the URL.
Active
Mark this checkbox if the template should be live in production. If checked, this template can be used by Salesforce users via buttons, process, flows, or batch calls. When you mark a callout template as Active, you are using one of your template counts as described in your Declarative Webhook subscription.
NOTE: You don’t need to have your template Active to test your callout.
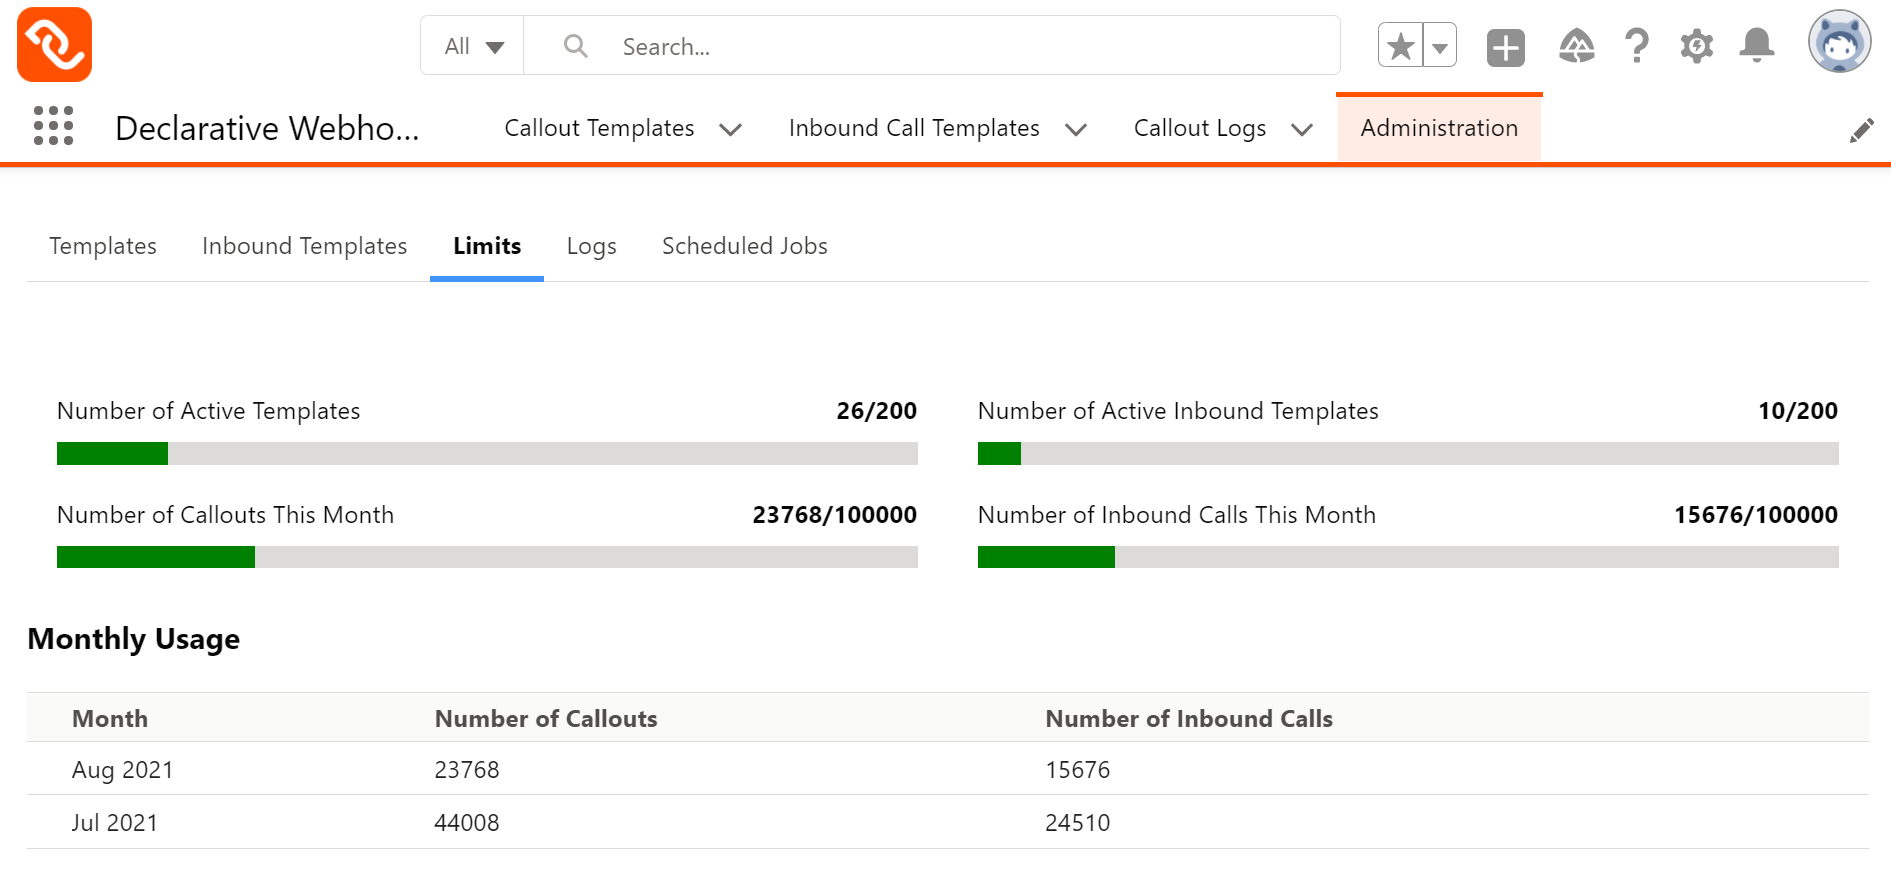
If you try to activate your template and receive an error, you may have hit your template limit. You can find your Active Template Limit by navigating to Administration on the navigation bar, followed by the Limits subtab:
Callout Authentication
Select how your Salesforce is being authenticated to the external platform. Click in the Callout Authentication input and a popup will let you choose what authentication to use.

Like Callout URL and Method, API documentation from the app or platform being implemented can direct you to which option to choose and further can provide an API Auth Key and API Auth Value if you choose those authorization types.
Basic and Bearer Token are the most commonly used but we have provided some quick definitions with details to help guide you:
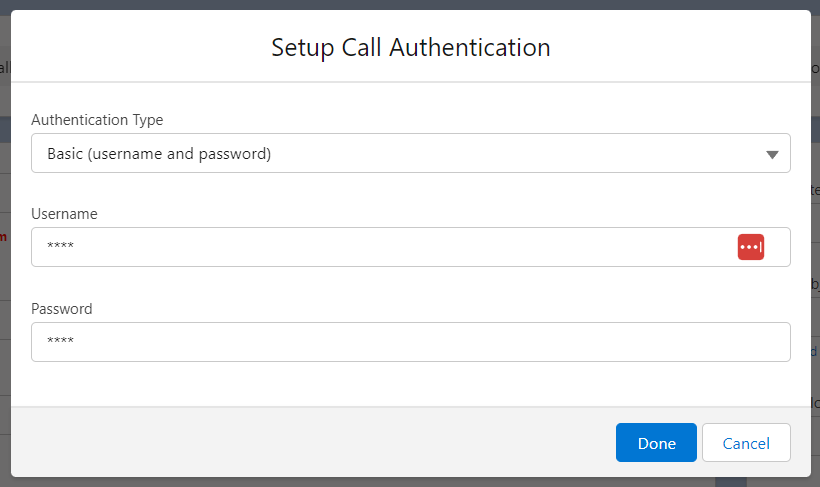
BASIC (username and password): This option will ask you to provide a username and password:
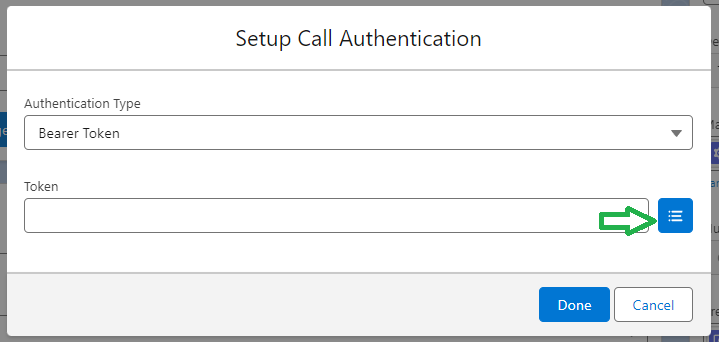
BEARER TOKEN: Once selected you can enter the Callout Authorization Token:
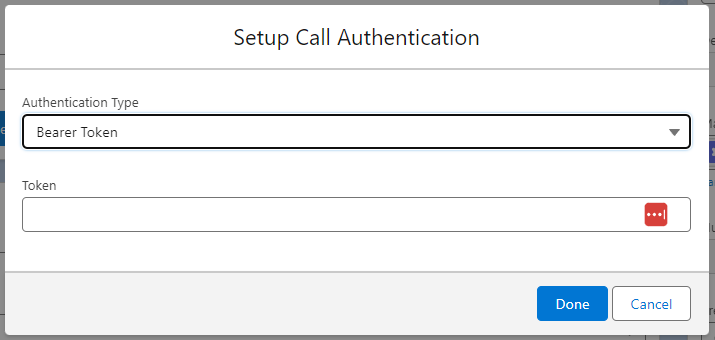
NOTE: The callout auth token can be extracted from the response body of the Pre Callout template (selectable in the right sidepanel). If you selected a Pre Callout, you have the option to choose the response node from the Pre Callout response body.
API KEY (in header): API Header puts the API Key in the callout template header:
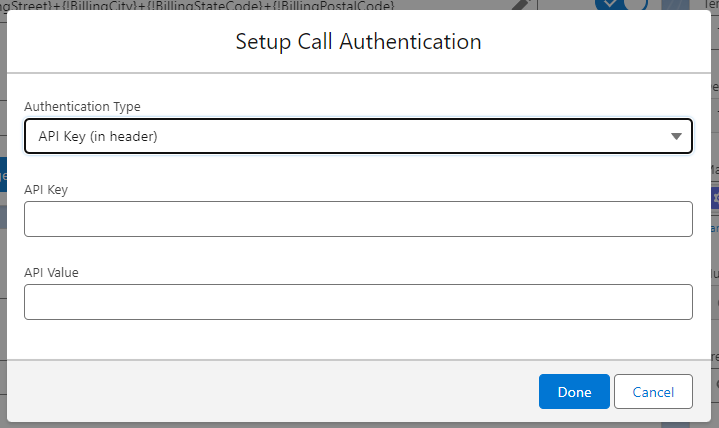
If you are uncertain of the Key or Values, be sure to check external platform API documentation.
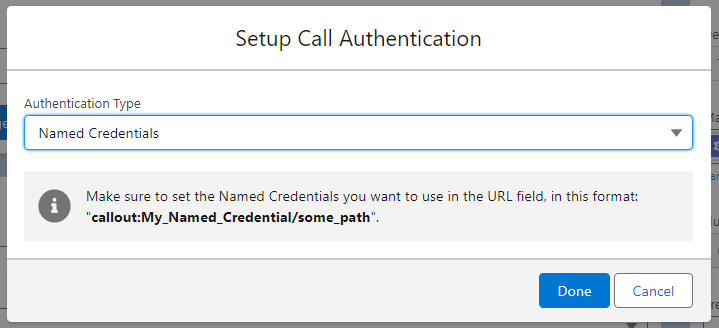
NAMED CREDENTIALS: Here you will need to set Named Credentials in the Callout URL Field on the Callout Template.
This picklist lets you choose what format the body of the request will have.

- JSON: this option will build the body in JSON format. For more details about the JSON builder, see the details about the 3rd step of this wizard.
- Example: { “name” : “John Doe”, age: 23 }
- Form URL Encoded: this option will build the body in the x-www-form-urlencoded format. For more details about this format, see the details about the 3rd step of this wizard.
- Example: name=John Doe&age=23
The option selected here will influence what you see in the 3rd step, where you build the request body.
Response Body Format
Same as with the request body, select the format you expect the response body to be in.
Template Name (Required)
This is the title of your template. You should name this something that you will be able to identify easily that is based on what the callout will do. For example, if you want to sync a Salesforce Account to QuickBooks, name this “Sync Account to Quickbooks.”
Main Object
A list of your SFDC standard and custom objects will appear in this dropdown menu. The “Main Object” is the object the callout will be based on.
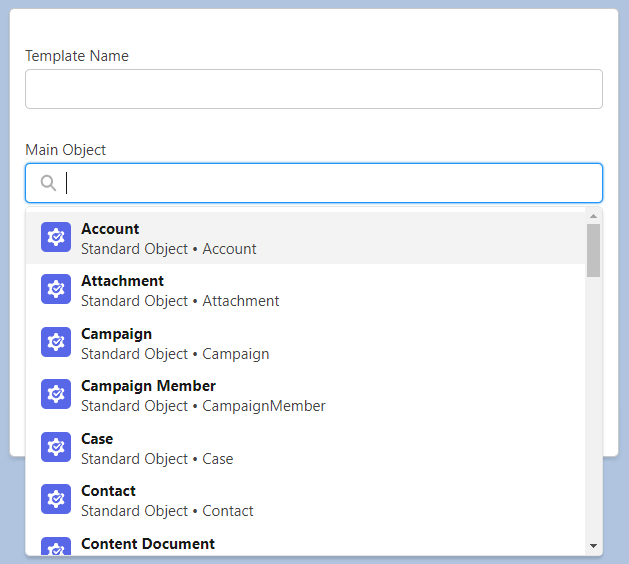
NOTE: Not all standard salesforce objects will appear here. If there is an object that is unavailable, please follow this page to make additional objects available.
In our previous example where we added API address fields to the Callout URL, the API field names come from the Main Object. So, in this example, our Main Object is ‘Account.’ The field in the URL set as {!BillingStreet} will pull from the Billing Street field on the Account object. Remember, the format of the fields added in the Callout URL must be the API field name, not Label: {!APINAME}.
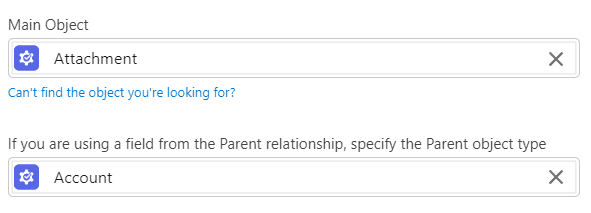
NOTE: You can leave the main object empty for static callouts without record details. An example of this could be when you’re creating a Pre Callout and need an authorization token. NOTE: If you select Attachment (Salesforce attachments) or ContentDocumentLink (used by Salesforce files) as a main object, you have the option to choose what type of object the Parent field (for attachments) or LinkedEntityId field (for files) is linked to. For example, if you want to send the attachment contents and the name of the parent account, select Attachment in the Main Object selection and Account in the second selector.
Number of records per Callout
You have two options in the number of records in your callout.
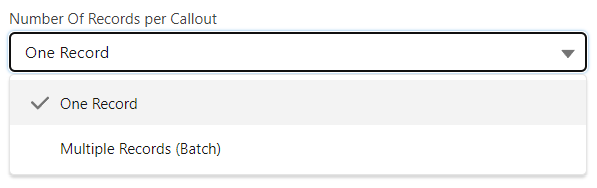
Most commonly you will start with one record, for example an Account or Opportunity record. However, if you want to send information from multiple records in a single call, select the Multiple Records (Batch) option.
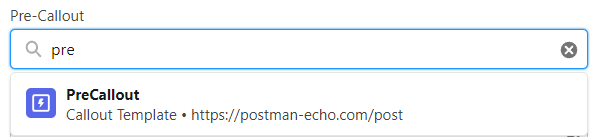
Pre Callout
Here you can select another callout template to be triggered before the callout template you are creating. For example, maybe you are accessing an external system that requires obtaining a token based on a username and password. In terms of order of execution, you will have the Callout Template added to your “Pre Callout” lookup to grab the token first and then the Callout Template you are creating will be executed.
NOTE: Pre callout template will need to be created before you can add it to the Pre Callout lookup.
Retrying a callout
This section defines if and how a failed callout using this template will be retried automatically. The automatic retry functionality is available for callouts made automatically (from a Process Builder, a Record-Triggered Flow or through Scheduled Callouts).
For more details, see the “Retry Support” section in this User Guide.
