Implementing a Callout Using a Button
Invoke a call manually with a button
To make a callout using the callout template from a page button or list view button on your Main Object, you will follow the traditional steps in creating an object button according to Salesforce documentation with a few specific details.
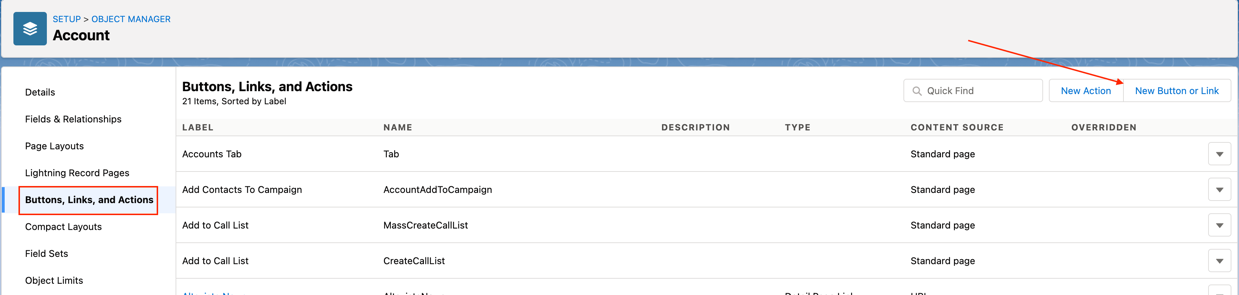
In Set Up, select Object Manager and find your Main Object specified in your Callout Template. On the left select Buttons, Links, and Actions followed by ‘New Button or Link.’
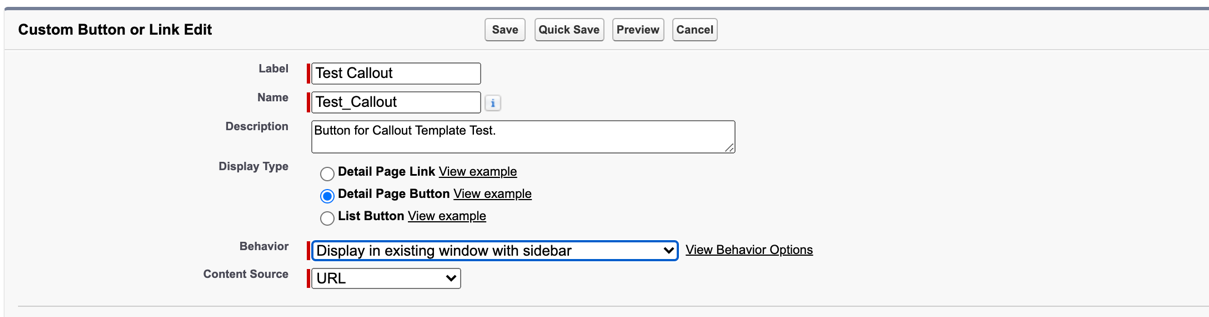
Provide the following on the New Button or Link screen:
- Label: Enter a name for your new button
- Description: Provide a short description of what template is being called
- Display Type: Select Detail Page Button
- Behavior: Display in existing window with sidebar (or preferred choice)
- Content Source: URL
In the body of the New Button or Link section, you will need enter the following URL, to which you will add additional parameters.
/apex/d_wh__MakeCalloutWithTemplate?
Parameters you can add to the URL:
- templateDevName=… or templateId=…
- Only one of these parameters is mandatory when making the call. These parameters are used to identify the template to use in the callout. The recommended one is templateDevName, since the Developer Name of the template is persistent when you export and import templates between orgs, and you don’t need to hardcode template ids in your Salesforce setup.
- You can identify your Callout Template Id / Callout Template Developer Name under the Administration tab – Templates subtab in the Declarative Webhooks app.

- &recordId=…
- If the template you selected has a Main Object, then the recordId parameter is mandatory to identify the record to use when making the callout. You will use the ID of the Main Object from your template. If your Main Object is Account then you can use recordId={!Account.Id} for a page layout button, or recordId={!Opportunity.Id} and so on.
- &previewCallout=TRUE
- Optional Paramater. If provided, the end user will preview the callout details each time before making the callout (rather than seeing the generic or custom message – see “message” parameter below).
- &viewResult=TRUE
- Optional Paramater. If provided, the end user will view the body and response code that’s sent back by the server.
- &returnUrl=/URLhere
- Optional Paramater. After clicking the Send Callout button, by default, the user will return to the record that they started the call from. If you want to redirect your user to a new page after they make the call, provide a returnURL. Some examples include redirecting the user to a list of Accounts in Salesforce, a next step page (Visualforce) or displaying a success message to the user. The returnUrl can’t be an external URL. It needs to be a relative URL.
- &message=…
- Optional Paramater. This is a message that the user will see after clicking the button and before the callout. It’s an unsafe practice to make the callout or change records directly when the page loads, so the user will see a message before making the actual callout. If this parameter is not added to the URL, a default message will be displayed. Make sure to URL-Encode the message.
- &buttonLabel=…
- Optional Paramater. If you add it, the “Run Callout” button will be renamed with the value of this parameter. Make sure to URL-Encode the label.
- &title=…
- Optional Paramater. If you add it, the Title the user sees on the page will be replaced with the value of this parameter. Make sure to URL-Encode the title.
- &successMessage=…
- Optional Paramater. If added, after the callout, the provided message will be displayed to the user. Also, if this parameter is added, the returnUrl parameter will be ignored. Make sure to URL-Encode the message.
- &callDirectly=TRUE
- Optional Paramater. If provided, the screen will skip the confirmation page and make the call directly. We recommend against using this, as each refresh of the page will make a call and the user will not have control over when the call is made.
Here is an example of callout button URL:
/apex/d_wh__MakeCalloutWithTemplate?templateDevName=MyTestCallout&recordId={!Contact.Id}&successMessage=The+callout+succeeded
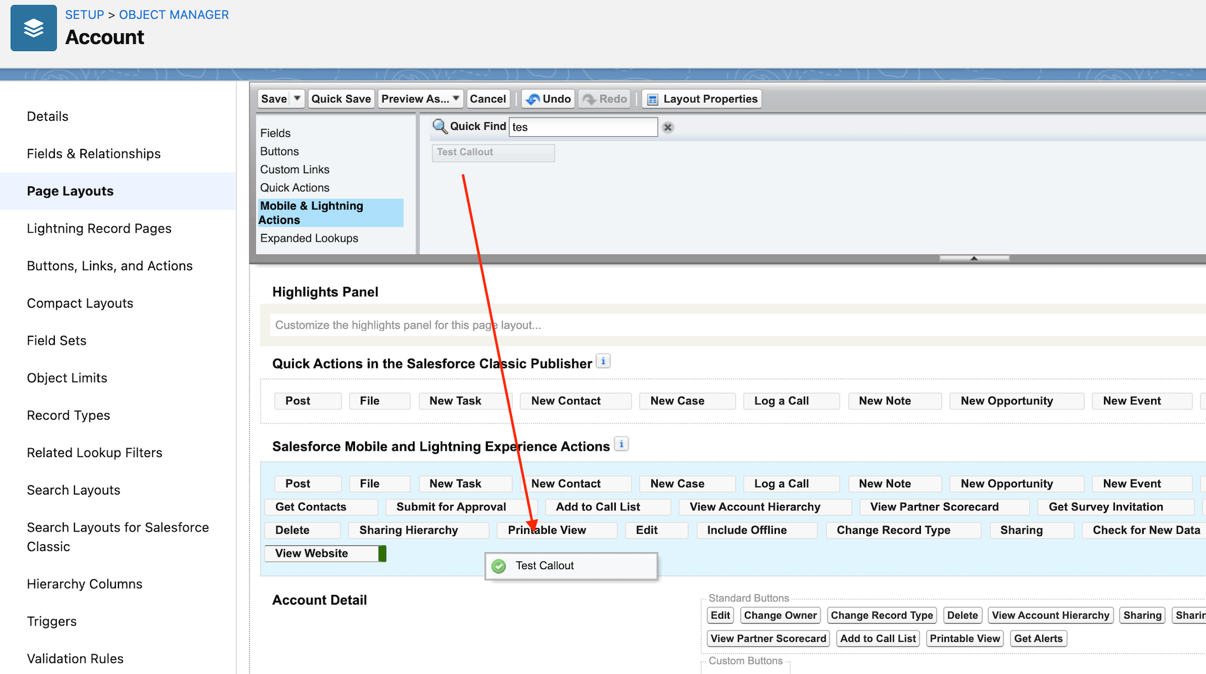
After you have completed your URL, select ‘Save’ at the top of the screen (and don’t forget to add your new Button to the Page Layout!).
We recommend testing this in your Sandbox before Production.
If you want to review the Callout success of the button you have created, return to the Declarative Webhooks app and select the Call Logs tab.
